COFFEE TABLE
- three16ths
- Aug 16, 2019
- 3 min read
Updated: Jan 10, 2021
Three years ago, I had the opportunity to cut a large branch off a walnut tree just before a friend of ours sold the property. I had no idea what I would do with the logs at the time. I went ahead and cut them into 4 foot lengths, since that is the longest I can handle when resawing on my bandsaw. One and a half years ago, I saw how some people had bent wood with kerf cutting, and it intrigued me. Right away I thought it would be neat to make a coffee table using kerf cutting.

Not wanting to ruin the good walnut wood on trying a new method that I wasn’t familiar with, I did a practice project with an old cedar deck beam, that someone was throwing out. You can see my practice project, on this blog, labeled “Patio Storage Box”.

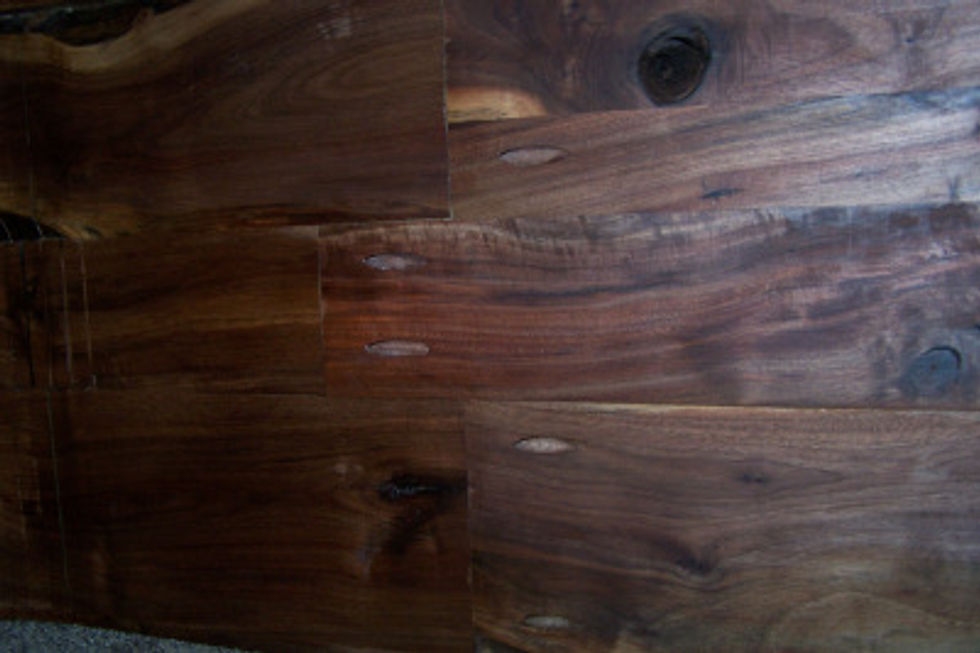
After cutting up all the logs I had, to 2 inch thickness, I picked out three pieces that didn’t have any large knots that would hamper bending the wood. I chose two longer pieces to be on the outside edges of the table. I picked one shorter piece to go in the middle. With butt joints on the top of the table, staggering the length of the boards strengthens the assembly.

To figure out the placement of the saw cuts you need to pick a radius that you think will look good. Then use the calculations that I already described in my other blog post, labeled “Patio Storage Box”.
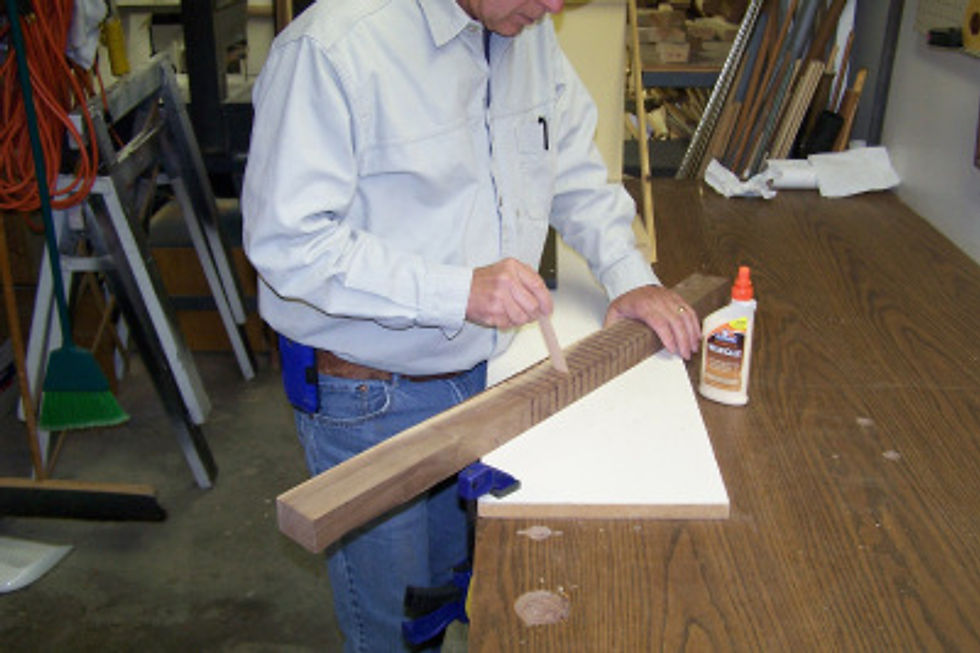
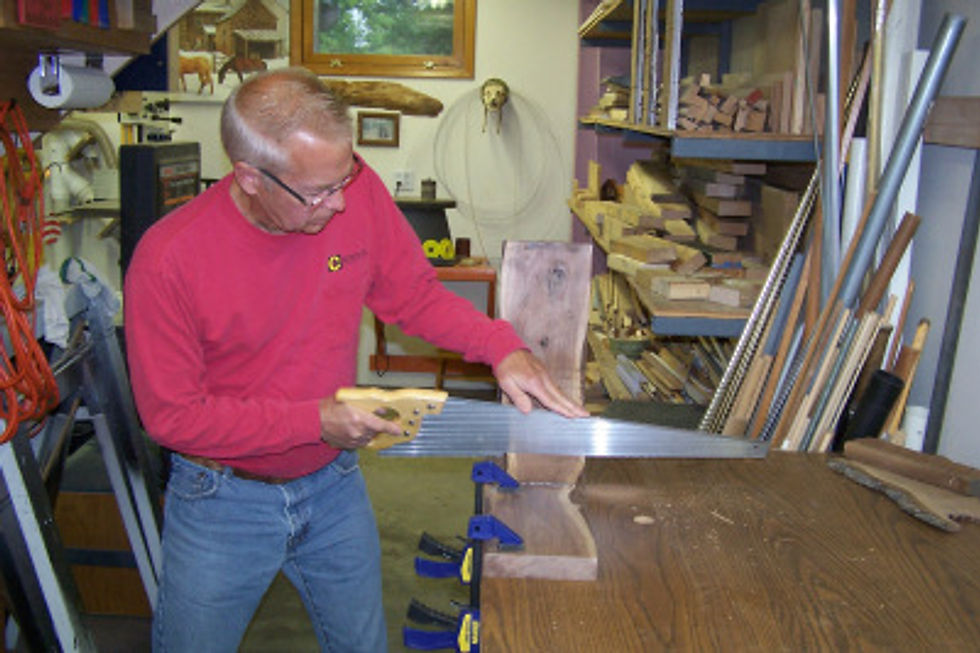
I cut my kerfs using a radial arm saw. I made a jig to space the cuts equal distance apart.


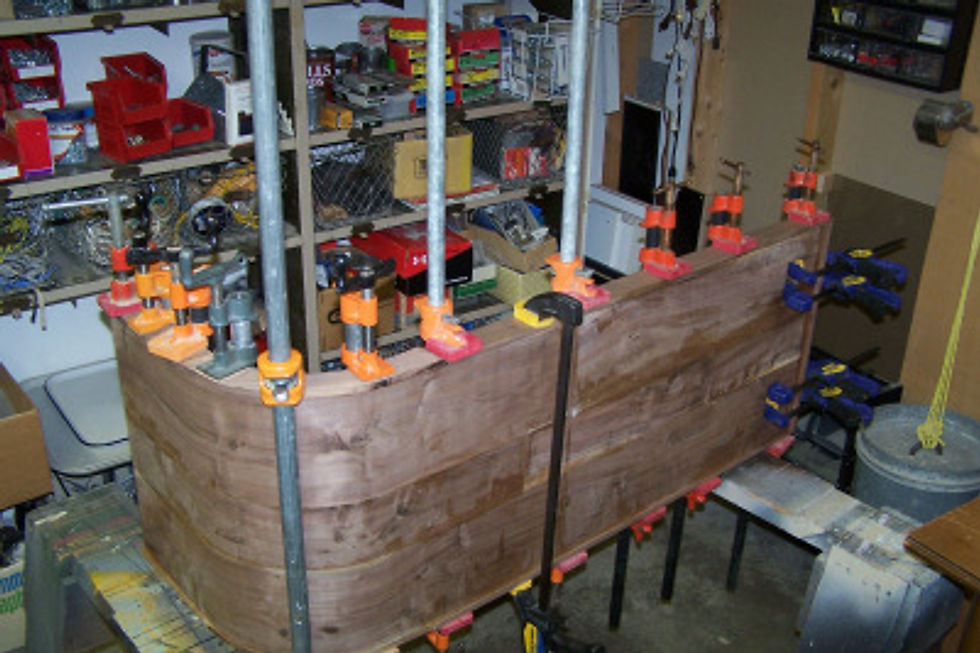
I made a 90° form to clamp the curved boards on to.

When applying the glue in the kerf slots, I preferred the interior wood glue because it’s not as runny as the exterior glue. Don’t pour the glue into the kerfs because the only spot that the glue will be needed is on the upper tips of the kerf. Instead use an old gift card or narrow stick to apply the glue to each side of every kerf cut. Work quickly before all the glue runs down.
No matter how careful I tried to make all my cuts consistent, and to clamp the bends up the same, the radius on each one ended up just a little different. To correct this, it was necessary to cut open one or two of the kerfs, to force the bends to match.
Only glue up two pieces at a time. Make sure you have plenty of strong clamps, as you may have to force some of the radius to match.


On this project I had to join boards end to end. Make sure the end cuts are tight on the good side of the table. There’s no good way to dress up an open end grain glue joint. I used pocket hole screws to draw the ends together.
I used a 3/8” strip all around the table to hide a lot of the live edge sections and the kerfs.
Lots of sanding.


I ran out of big pieces of wood for making the straight leg. I had to glue six small boards together.

When making the straight leg, I made it extra long. When it came time to trim it down to size, I slid the mortise and tenon together, and leveled up the table with the leg hanging over the side of the workbench. Then using a razor blade, I scored where the leg needed to be cut.


I found it easier to put the finish on the underneath sides before I glued the straight leg on.


I was really pleased with how nice the mortise and tenon fit. I used epoxy underneath only, and pounded the leg in. When chiseling out the mortises, the bottom sides were open a little. To make sure the joint remained solid, I ran a bead of removable caulking around the tenons, on the top side. Then I flipped the table over and filled in the gaps in the mortises with epoxy.


The removable caulking pulls off easily after the epoxy sets up.

I had recently made a Lichtenberg burner, so I decided to add a little artwork on the end of the table. I haven’t had too much practice with the burner yet, and it didn’t turn out like I had wanted, but there is no turning back once you start burning.


I chose to fill all the voids in the wood, and the burning, with epoxy, to give a smooth look. When mentioning that I used epoxy, note that I used three different types of epoxy. Depending on whether you are attaching something, or filling voids or holes, there are specific epoxies for different applications.


After sanding the table down to 1,000 grit, I used a 5 step oil finishing process. It turned out amazingly smooth.


Comments