DRUM SANDER
- three16ths
- Nov 15, 2020
- 5 min read
Updated: Feb 8, 2023
For the past four years I’ve kicked around the thought of either building, or buying, a drum sander. With my 6” belt sander, I’ve always thought it might be nice to have a second one, so that I could have 80 grit on one sander, and 120 grit on a second sander. I knew I would have the same dilemma with a drum sander. This prompted me to go ahead and build my own drum sander with interchangeable drums, having different grits.

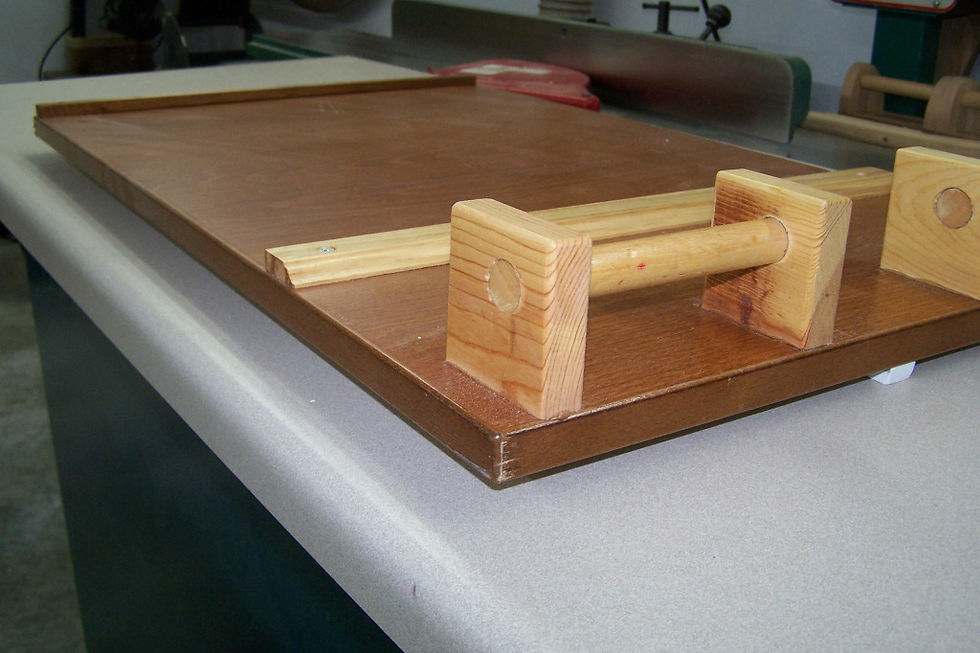
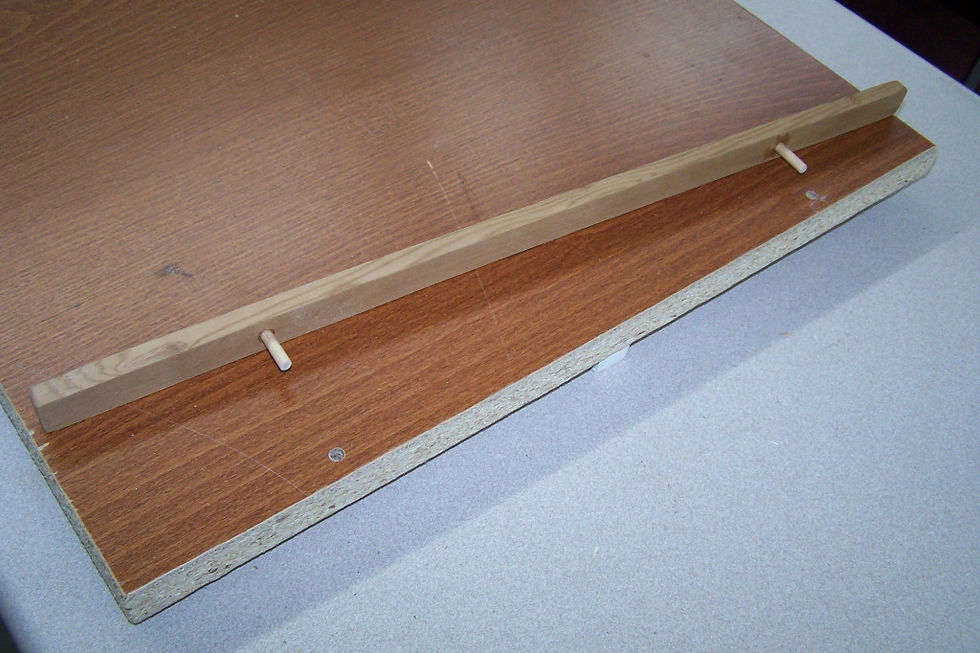
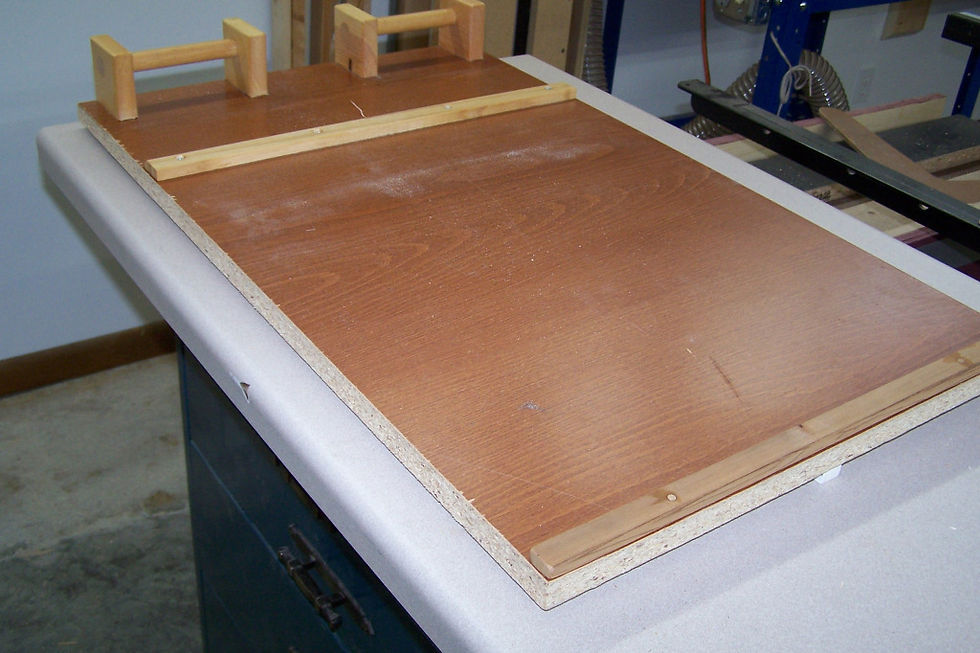
I decided to keep it simple and have the table that tilted for different thicknesses of wood. I also went with a sled, to push smaller projects through. For the table I used a section of a 1 1/8” thick countertop with Formica on it. This provided a flat slick surface for the sled to slide on. I installed an aluminum track in the table, to keep the sled from wandering off to the sides.

The sled has a PVC runner, that rides in the track. I also had to put a removable board at the end of the sled, to keep the project from sliding off, when the table is tilted downhill.

To assure that the tilting table didn’t have any slop to it, I tapped ½” threads for the pivot points, into the table. I used 3” long ½” bolts for the pivot end. When tapping into wood, I always drill the pilot hole, two sizes smaller than the drill bit size recommended for tapping metal. Then after tapping the hole, I’ll line the hole with super glue. For this situation with the countertop being made with pressed board, I used two part epoxy to line the tapped hole. Then I had to re-tap the threads again. I knew that once I assembled the sander, I wouldn’t be able to fix the tapped holes, if they stripped out later.
When installing the pivot block assembly, I mounted the 1” cold rolled steel shaft that was to be used for the drums. I was very meticulous in making sure the table was perfectly square and level with the shaft, down to thousandths of an inch.


The table adjustment assembly can quickly slide up or down to get the table close to the height that you want. Then there is a 3/8” threaded rod for fine tuning.

The threaded rod is pushing on a steel plate underneath the table.

Afterwards i found that I needed to add another board to help keep the table adjustment assembly from tipping.


Later on, as I was sanding a large amount of boards, that needed to be sanded to the same thickness, I realized that the "fine tuning" adjustment threaded rod, was turning down, slightly, with the vibration from the sander. I don't have a good fix for this, other than to mark the handle and monitor it to make sure that I keep it at the same spot.


The 1 ½ H.P. motor is mounted on a thick board that is adjustable with a 3/8” threaded rod. The 2 x 4 supporting the motor mount, pivots on ½” bolts that are tapped into the 2 x 4.

The 5" drums are made with ¾” MDF. I used a Jasper circle cutting jig with my router, to cut these.

Then, with a 1” forstner bit, I drilled the hole for the 1” steel shaft. I sanded the edges of the 1” holes to make sure there was nothing to keep them from sliding completely together, when it came time to glue them up.


I also cut the sheaves for the drum and for the motor. Then with a lathe, I formed the grooves for the 4L540 belt, in the sheaves. Here I am cutting the slot for the keyway to go on the motor shaft.


To make it quick and easy to change out the drums, I put in an idler pulley for tightening and loosening the belt. When running the sander, you simply pull back on the handle to pivot the idler pulley into the belt, which takes up the slack in the belt. The arm is mounted snug, with a ½” carriage bolt, so that it stays in position. I used a pair of ½” flange bearings in the idler pulley, with a ½” x 2 ½” long bolt for supporting the pulley. When purchasing the flange bearings, you need to make sure that the bearings are rated for the speed of the motor, which is 1725 rpm. I used Graingers # 1ZGE8 bearings.

The 1” pillow block bearings are mounted on a wood block that is cut with a 5° bevel. This makes changing out the drums simple and precise as they slide exactly into place. I tapped ¼” holes into the blocks to screw in a 1 ¼” long bolt for the draw latch.

The MDF discs were cut 5” in diameter. However after sanding the completed drum, I ended up with about a 4 3/4" diameter drum. To attach the sandpaper, I cut a 10° wedge shape in one of the discs and epoxied a ¼” t-nut in it. Then with a piece of hardwood I made a matching wedge for pinching the sandpaper in.

Starting at the end away from the sheave, I started assembling the discs on the shaft. I used wood glue to glue them together as I went. You need to take the time to clamp every single disc on with some wood clamps as you glue them up.
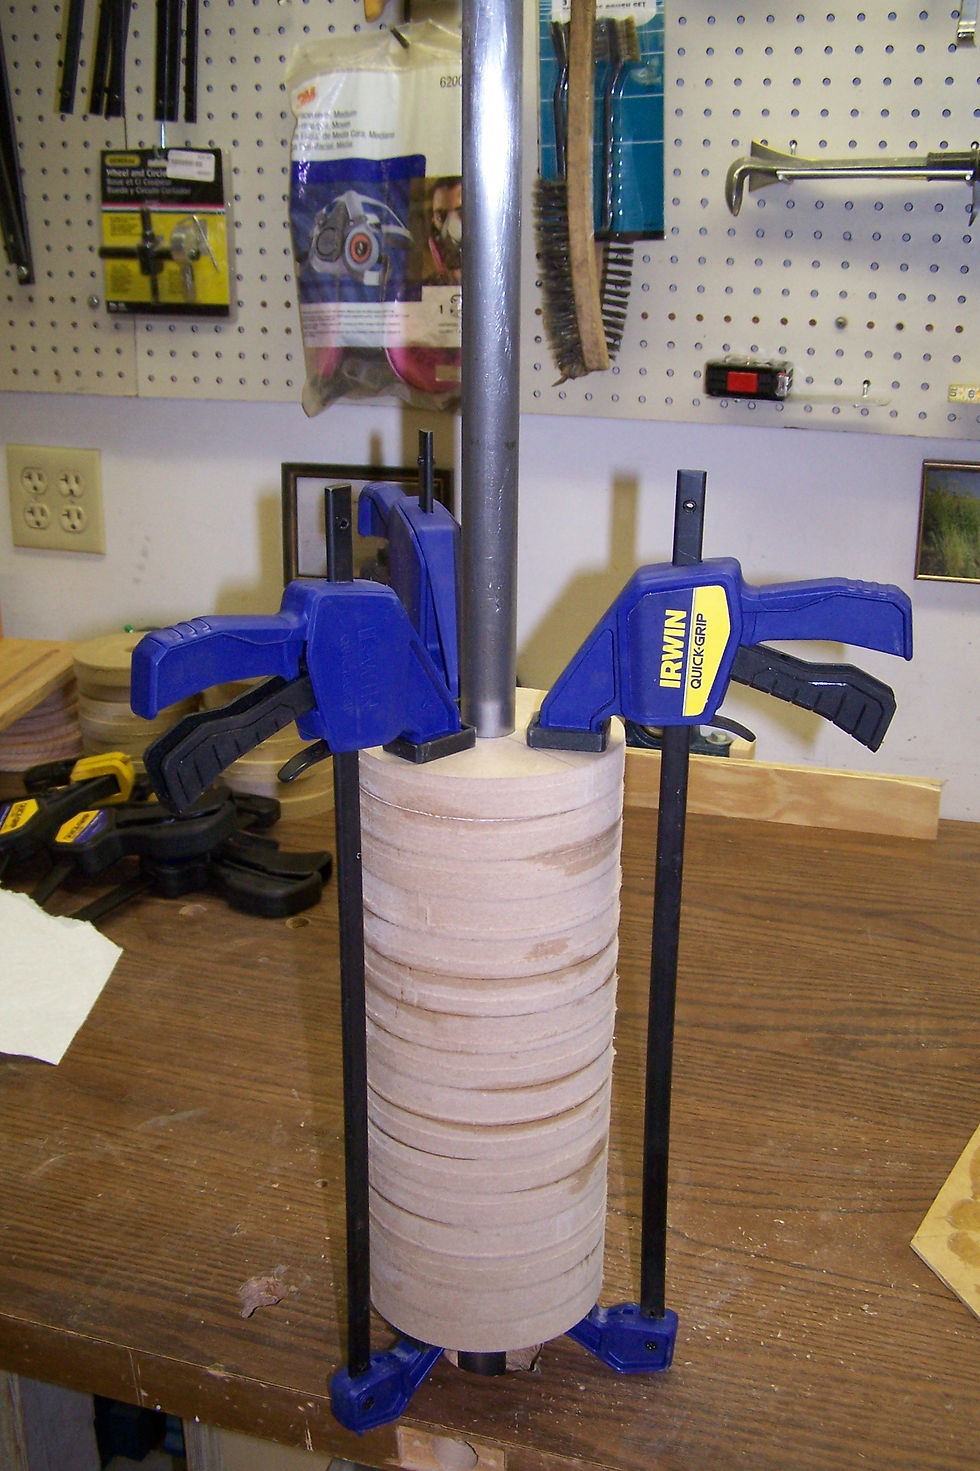
On the end with the sheave, I had no way of knowing where the wedge needed to be, so I didn’t glue the second wedge disc on. I just temporarily screwed that piece on. The next disc I epoxied three ¼” t-nuts in it, for bolting the remaining disc and the sheave on. I did this because I knew that I would need to be removing them later to adjust the wedge disc.


Now that the drum is all made up, I glued a strip of 40 grit sandpaper to a board for trimming down the drum. Go ahead and run the machine and push the sandpaper into the drum. Gradually raise the sandpaper until the MDF is even all the way across.


Once this is done you can wrap a roll of sandpaper on the drum. I used 2” wide rolls for mine. Start at the end away from the sheave. Note that there are arrows on the back of the sandpaper, showing the direction of rotation for the sandpaper.

When you get the wedge disc at the other end, you’ll have to mark where the sandpaper just meets the disc. Now you have to remove the sandpaper and drum from the machine, so that you can reposition the wedge disc to the position that you just marked. I still would use screws to attach these last discs into place, rather than gluing them in, just to be safe.


For times when I need to move the sander, I added two wheels that are mounted just barely above the floor level. That way it’s sitting solid on the floor, but by lifting up on the opposite side just a little, the wheels make contact.


I also cut one of the legs an inch shorter, for an adjustable foot, to keep the sander steady on an uneven floor.


I chose 40 grit, 120 grit and 220 grit sandpaper for my three drums. With this design, it only takes a little over a minute to change out the drums. This makes the decision of which grit sandpaper to buy, a little bit easier.

Simply unlatch the draw clasps, then by releasing the idler pulley you can easily lift the belt off of the sheaves. Then just lift out the drum.


Now you can set the new drum back in its place. Secure the draw latches, and tighten the idler pulley on the belt.


Comments