COMPASS STAR
- three16ths
- Mar 12, 2023
- 6 min read
This was a learning process for me, as this was my first veneer project.
You MUST draw out your design to scale on some graph paper. You can't make this without having the full scale drawing. After you have a design in mind, make all the veneer you'll need for the project.


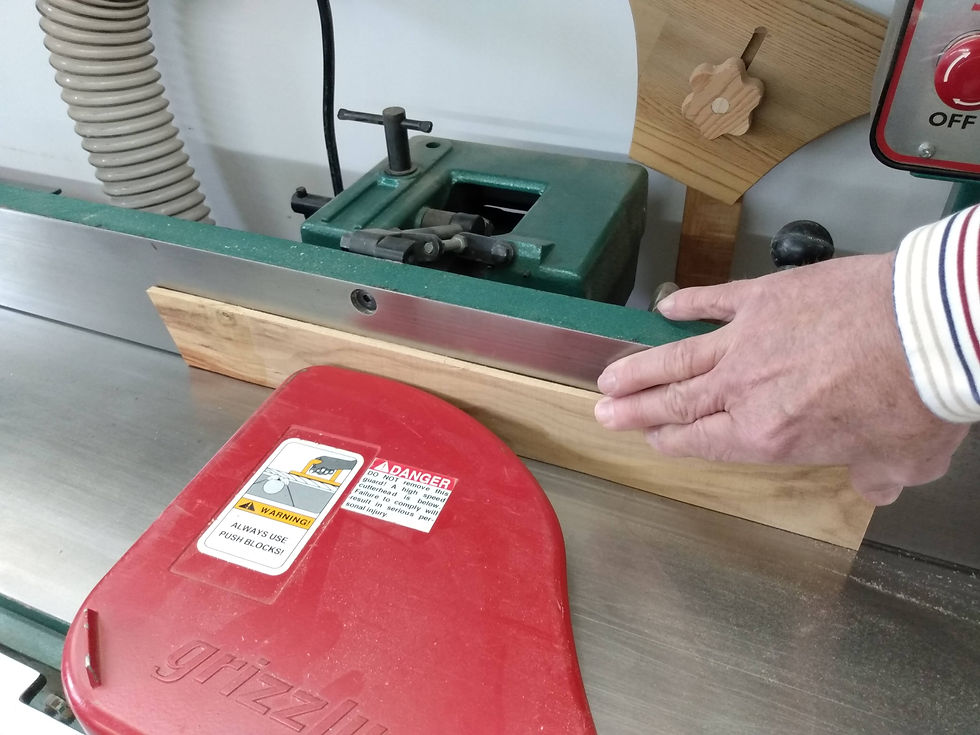
The edges must be trimmed absolutely straight on a jointer.
You will need to make a designated sled for cutting the veneer.


Make a jig to mount on the sled that will have consistent pressure, right where the blade cuts.

Cut out all the the shapes with the sled. You must have a good sharp blade on the table saw for this.

Now you'll need to make up a wedge assembly to hold the veneers in place, for gluing. Put wax paper down, so the veneer won't stick to the table.

Use a hypodermic needle to apply a few drops of thin C A glue. I used a 21 gauge needle. You just want a few drops to hold it together at this point, until you can take it out of the wedge assembly jig. Otherwise the glue would stick to the jig. The C A glue will immediately wick into the veneers. Then give a shot of accelerant spray, while you're holding the pieces in place. In the picture you can see that I have a thin black veneer separating the colors in my design.

Give it about 30 seconds, then you can remove that section to finish adding more C A glue to this section. Use the accelerant also.

After all the smaller triangle pairs, for the inside circle are glued up, you can glue them all together to form the circle.

Sand the circle semi-smooth, just enough to have a fairly flat surface on both sides. Draw the circle shape you want, and cut it out on a bandsaw or scroll saw. This cut doesn't have to be precise.
Cut a cardboard circle slightly smaller than this veneer circle. Use this as a pattern for marking the shape of the center circle onto the outside compass rays, for trimming off the rays.


After you have all the curved portions of the rays cut, lay the larger rays on top of the smaller rays, to mark where to trim off the smaller rays. Put painters tape on the smaller ray, then with a knife, score the painters tape, marking where to cut the smaller ray.


Cut close to the painters tape, then sneak up on the line with a strip sander.


Now it's time to transfer the points from the drawing to the base plywood. I used a sharp scratch awl to mark the center, and the ends of the rays, and also where the lines are at outside of the circle.


Now I can glue the center circle onto the plywood base

The triangles on my circle didn't all match up where they should on the drawing, so I taped the circle, and drew the lines in where they would be evenly spaced. This was just so I could have even markings, for lining up the out side rays, during glue up.
At this point, you may have to sand a little on the inside of the rays, so they will fit close to the inside circle. Now you can line up the rays outside points, with the scratch awl markings. Then start gluing the rays on.


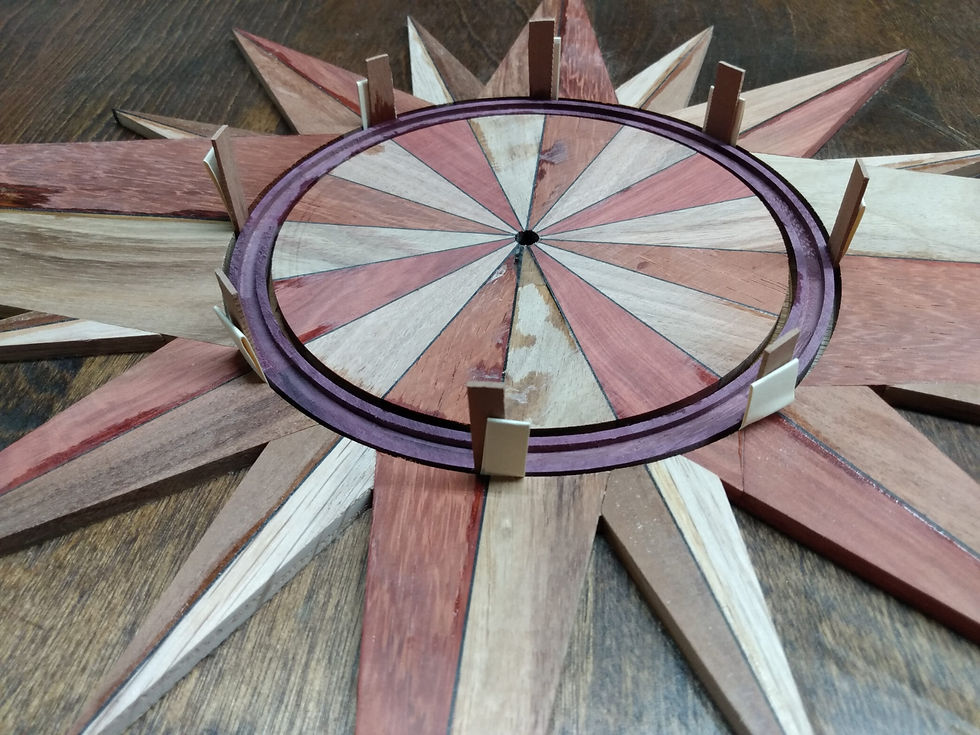
My next step was to make a ring that will cover up the transition from the rays to the inner circle.
Since the veneer is too thin to cut segments on the table saw, I had to use a bandsaw to cut the segments. It's hard to be as precise making segments on a bandsaw, so I had to make the ring in two steps, to get perfect glue joints.

I chose to make a wheat design in the circle, for a little decoration. The first step is to resaw some very thin strips of purple heart and cherry.

I also cut a 3/8" thick strip of purple heart.

This strip is cut at a 11.5° angle. This is the angel that I want the wheat grain to have.

The two halves are used to sandwich the very thin strips of cherry and purple heart.


Run one side across the jointer, to get one flat side.

Now I can cut a thin strip off of one side of this block. Then cut multiple equally thin sections off of this strip.

Glue a very thin strip of purple heart to one side of four of these sections. This is half of the wheat design. Also glue a very thin strip of cherry to one side of four other sections.
This is the other half of the wheat design. The purpose of this is to strengthen the sections, because these sections will be bent into a circle. Without the extra thin strip, the sections would break apart when bending them.


Sand off the excess of the thin strips on a strip sander.

Now we need to make a form for gluing up the wheat design in a circle. You want to use some type of a plastic material that the glue won't stick to. I used a cutting board for this, however some HDMI is better to work with. It cuts a lot cleaner, and doesn't melt onto the router bits. When cutting the circle into the plastic, with a circle cutting jig for the router, cut the identical circle into the purple heart ring.
You'll see that I drilled some holes in the plastic ring. This is for pushing the completed ring out of the form, after it is all glued up.


Using a hot plate, I heated up the wheat design halves, so that they would bend easier. Place the warm strips into the plastic form, lining up the two halves the way you want them. Using the steam from iron, helps soften the wood, to assist pushing the strip into the form the way you want it to set. Then with a hypodermic needle, apply some CA glue. Then spray some accelerant, to set the glue up.


Make a slot in the plastic. This slot is for guiding a saw, for trimming the glued up sections into the one fourth diameter pieces. I used a hacksaw for trimming the pieces. I Glued the ring together at this point, but it would be better to glue the completed ring, after you place it in the wooden ring.


Now use the circle cutting jig to cut the inside and outside diameters on both the purple heart ring, and on the star. I used a very tiny router bit for this. The thickness of the bit cut is filled in with some more thin veneer strips.


I used some wedges to center the purple heart ring into the star. Use just a few drops of CA glue to set the ring in place. Then remove the wedges, and add more CA glue to finish gluing the ring in place.
I had some ebony veneer that I cut into narrow strips, along with some cherry veneer strips that I made.
For the cherry veneers, I cut thin strips, then cut the strips into narrow pieces. Then I pull these pieces through the strip sander.
I used these veneers to build up the gaps on the inside and outside of the ring, made with the tiny router bit.


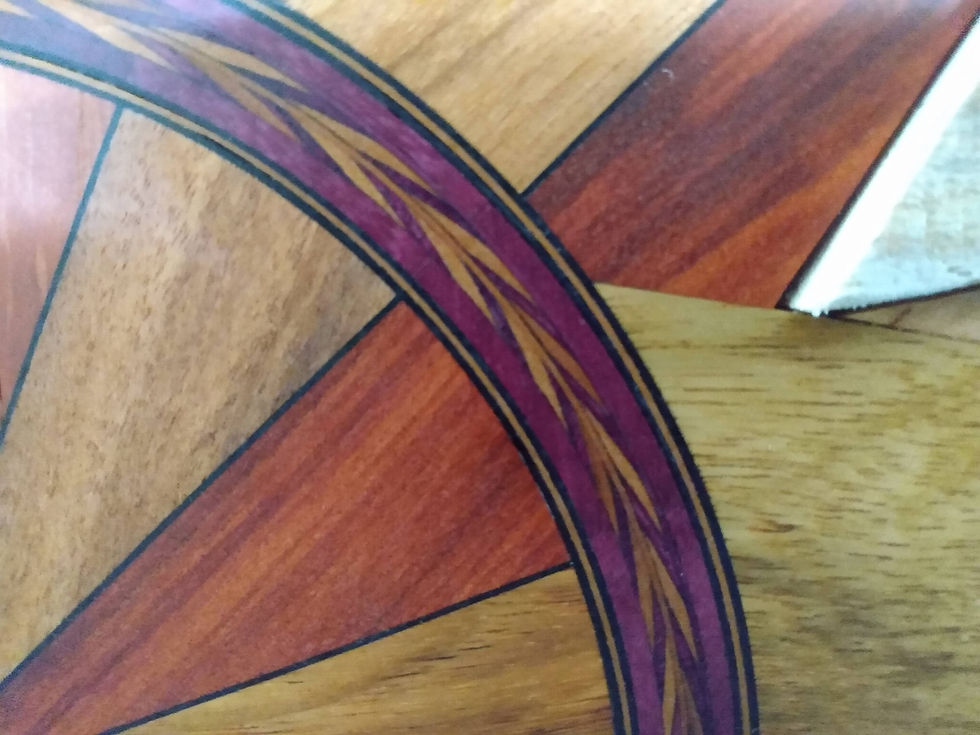
This is a close up of the finished grain pattern.
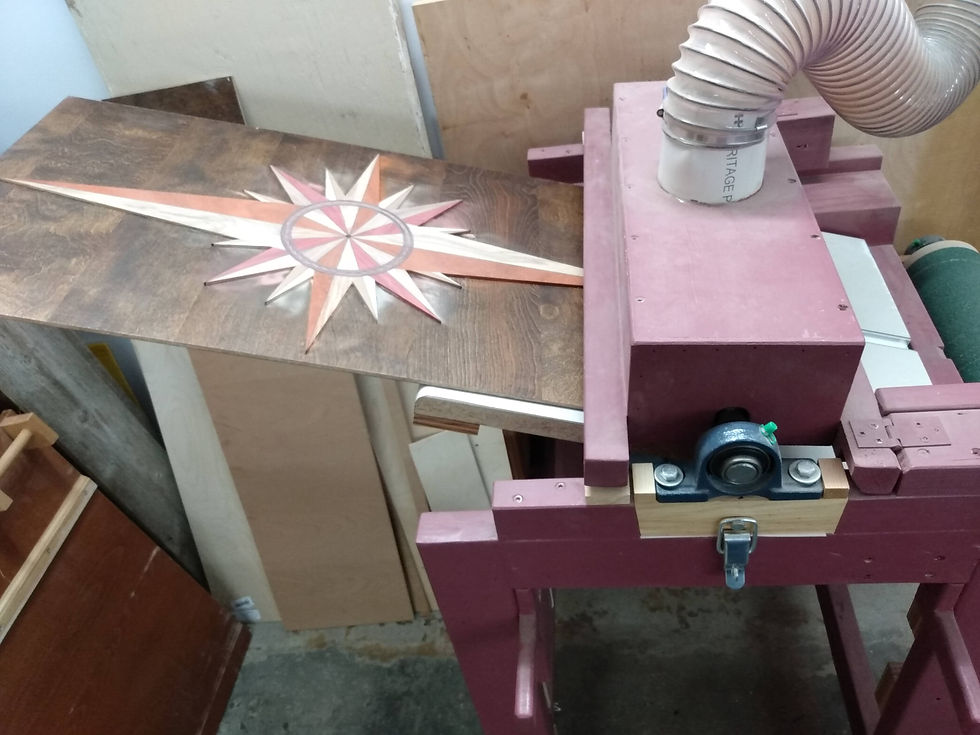
After everything is all glued up, I ran the completed compass start though the drum sander.
Now I carefully cut out the 1/4" plywood backing out around the entire star, with a finish jig saw blade. I set the blade at a 45° to make sure that I wouldn't hit the edges on the star. I used a coping saw to get into the inside corners.


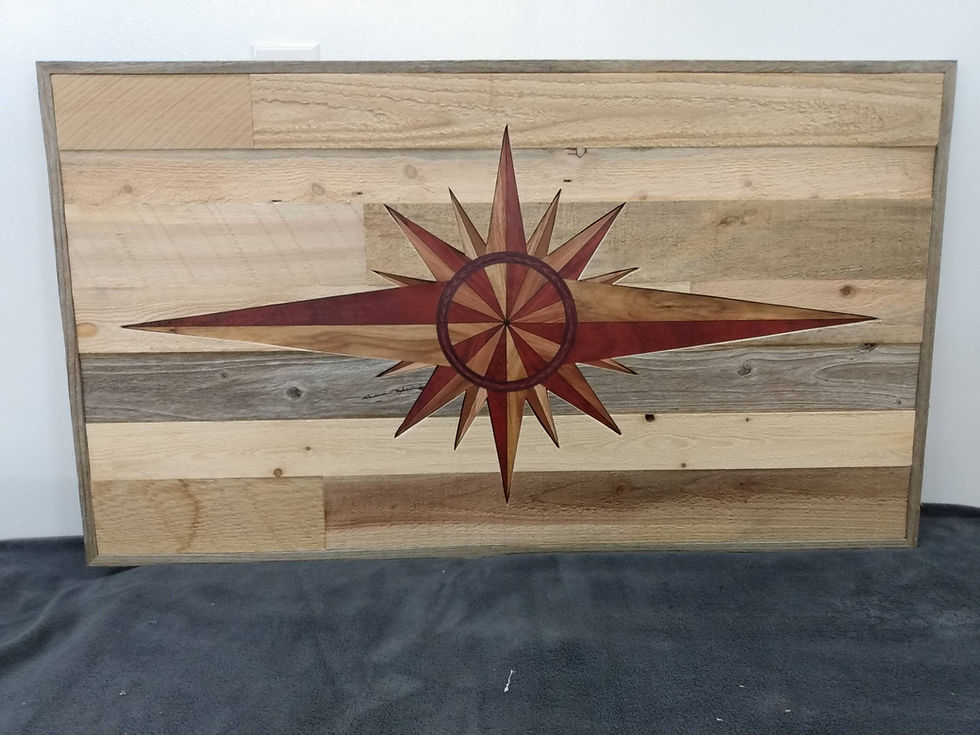
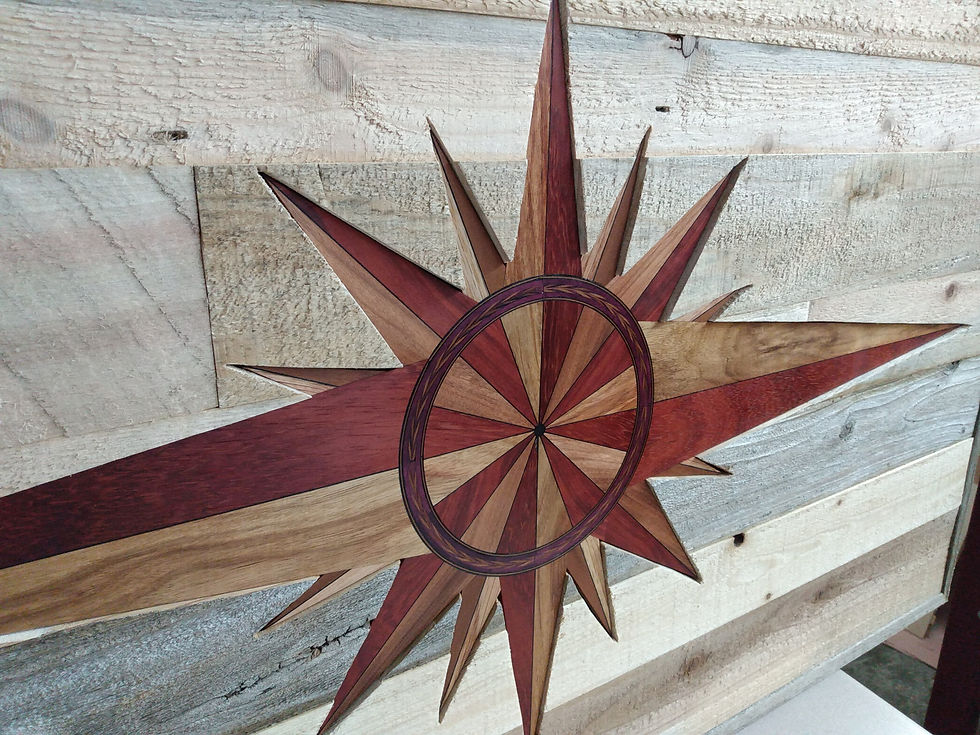
This star is going to be recessed in a plank made of pallet wood and recycled fencing. I glued up a plank big enough to hold the star. The back side of the boards are made smooth before gluing up.


On the back side of the plank, I traced out the shaped of the cut out star. Then with the jig saw again, I cut out the shape of the star. I made the cuts close to the desired shape, then snuck up on the finished shape, with a fine rasp file and coping saw.


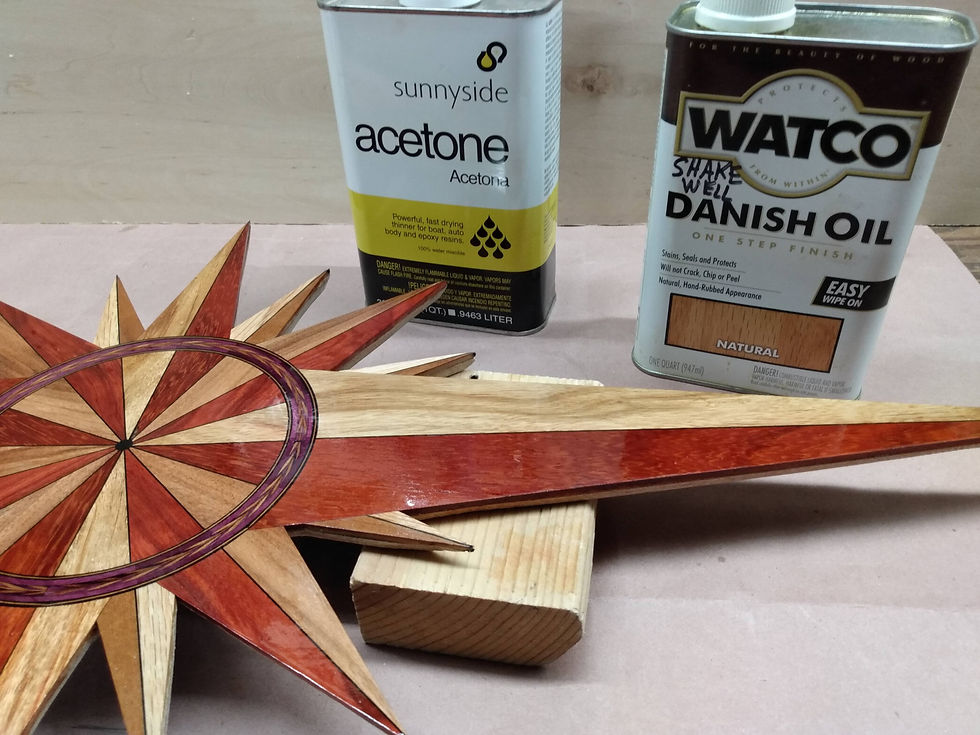
When you sand purple heart, it turns the color a dull brown. For the purple color to come back, you have to let it be exposed to light.
After letting the star sit by a window for a week, to get the color back into the purple heart, I wiped down all the exotic woods with some acetone, to dry up the natural oils in the woods. Then I applied a Danish Oil Finish.
After the finish was good and dry, I glued the star to a 1/4" backing board.

Then I glued the plank onto the backing board.


Next I trimmed the entire piece even on the table saw. Then I cut in two keyhole slots in the back. For a wall hanging this big, I prefer to have two hangers, so it will stay straight on the wall.


I used some more old fencing for making the trim.

I like how the bright colors jump out from the rustic pale recycled wood. For the star I used Canarywood, Padauk, Rosewood Patagonia, Redheart, Red Oak, Cherry and Purpleheart.


Comments